One thing we’ve noticed recently is how underused image files are on websites. It’s so easy to add images to your website, and optimize them for search engines, so we thought we’d give you a step-by-step guide for optimizing images on your website, for you to follow.
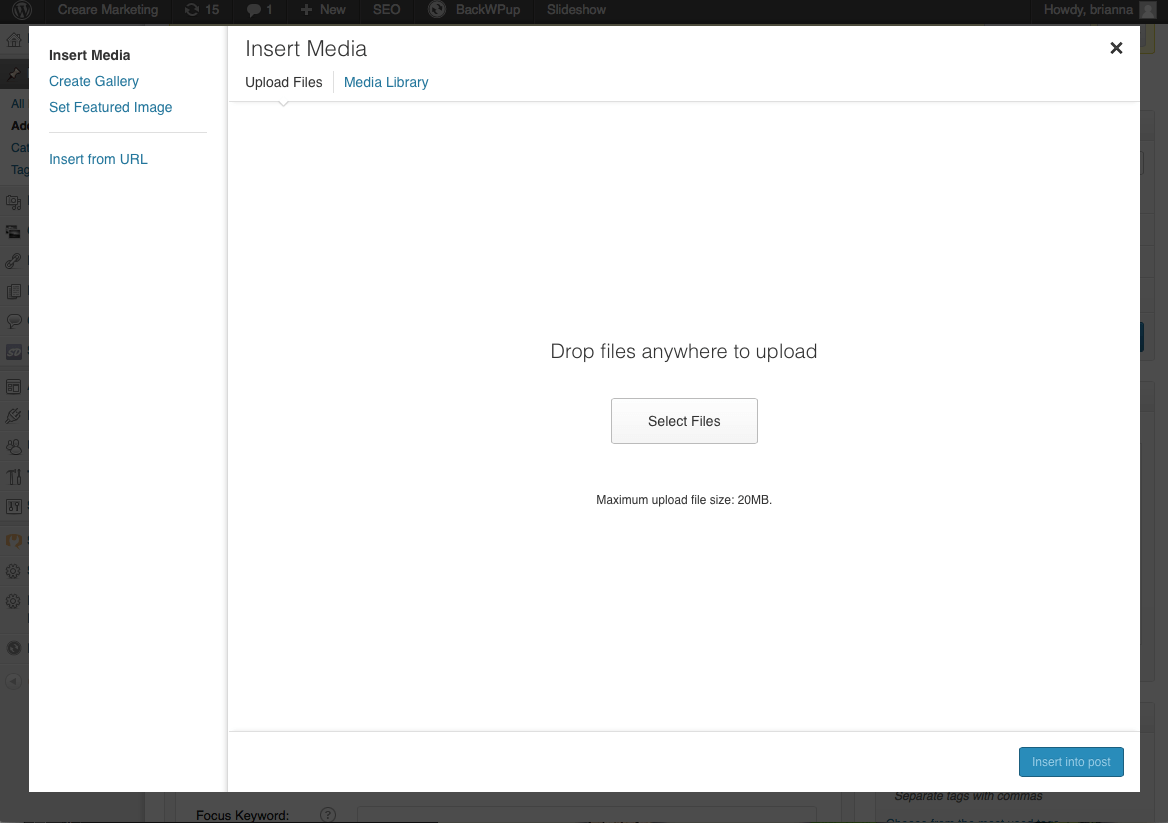
1. Click “Add Media” on your post/page view, or click Media on your left menu. Then, drag the file you want to upload to the screen.
2. Now, you need to fill out all the fields that appear once your file is uploaded. Think about the keyword you want to optimize for. Here is what I put in for the above image. The Title, Caption, Alt and Description should all have related keywords, but be slightly different.
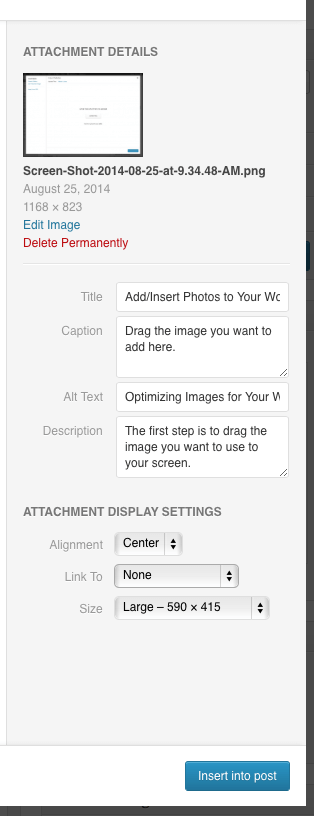
3. Insert your image into your post/page/gallery. Note, if you DO NOT want a caption, leave that field blank. The Title & Alt tags are the 2 most important tags for optimizing your image to show up in image results on Google.
We hope this helps you the next time you add images to your website. Have any other tips? Leave them in the comments below.
And, don’t forget to check us out on Facebook, Google+, and Pinterest for more tips, tricks, and inspiration! Contact us if you need help!
Frequently Asked Questions
Why is optimizing images important for my website?
Optimizing images is crucial for SEO because it helps your website load faster and appear in Google Image results. By properly optimizing images, you can improve user experience and boost search engine rankings.
What does it mean to optimize images on my website?
Optimizing images refers to the process of making sure your images are both technically and SEO-friendly. This includes using the right file sizes, naming your files with relevant keywords, and filling out the Title, Alt Text, and Description fields with descriptive text related to your content.
How do I optimize images for SEO?
To optimize images, you should upload your image, then fill in all the metadata fields like Title, Caption, Alt Text, and Description with keywords related to the content of the page. The Title and Alt Text are especially important for helping your image rank on Google.
What should I include in the Alt Text when optimizing images?
When optimizing images, Alt Text should describe the content of the image while naturally incorporating relevant keywords. This helps with both accessibility and search engine ranking, as Google uses Alt Text to understand the content of images.
Can I use the same keywords for the Title, Alt Text, and Description when optimizing images?
Yes, but it’s important to vary the wording slightly across the Title, Caption, Alt Text, and Description fields. This helps you avoid keyword stuffing while ensuring that your image remains relevant to the page’s content.
Do I need to optimize every image on my website?
Yes! Every image you add to your website should be optimized. This includes using relevant keywords in the Title, Alt Text, and Description fields. It’s a small step that can greatly improve your SEO and image search visibility.
How does optimizing images affect my website’s loading speed?
Optimizing images includes resizing and compressing them to reduce file size without compromising quality. Smaller image files load faster, which enhances user experience and improves your SEO rankings, as search engines prioritize page speed.
How do I know if my images are properly optimized?
To check if your images are optimized, look at your site’s load speed and whether your images are showing up in relevant Google Image searches. You can also use tools like Google’s PageSpeed Insights to identify and resolve any image optimization issues.
What are some tools I can use to help with optimizing images?
There are several tools to assist with optimizing images, such as TinyPNG for compression, and ImageOptim for file size reduction. Additionally, WordPress plugins like Smush or ShortPixel can automate the image optimization process on your website.